There's a certain magic that washes over us as autumn leaves begin to fall, bringing with it a longing for cozy evenings, crackling fires, and, of course, delightful seasonal treats. Among these cherished fall traditions, one stands out for its irresistible blend of crispness and gooey sweetness: the ultimate caramel apples, a favorite fall treat for generations. Imagine sinking your teeth into a perfectly ripe apple, its tart crunch giving way to a rich, buttery caramel coating that clings delightfully to every bite. It’s more than just a dessert; it’s a portal to cherished memories of childhood carnivals, bustling fall festivals, and heartwarming family gatherings.
This comprehensive guide will help you craft your own perfect caramel apples, transforming a simple fruit into an extraordinary indulgence. We’ll dive into easy-to-follow recipes, explore a universe of creative toppings, and share expert tips to ensure your homemade creations are nothing short of spectacular. Get ready to awaken your senses and create new, sweet memories that will last a lifetime.
Why Caramel Apples are the Quintessential Fall Indulgence
The allure of the caramel apple lies in its exquisite balance and nostalgic charm. For many, the sight and smell alone evoke a powerful sense of nostalgia, instantly transporting them back to simpler times. Picture the vibrant lights of a county fair, the laughter of children, and the distinct aroma of sweet caramel mingling with crisp autumn air. It’s this sensory experience that makes ultimate caramel apples a favorite fall treat, deeply embedded in our collective memory of the season.
What makes this treat so universally beloved? It's the delightful contrast. The inherent tartness of a Granny Smith or the subtle sweetness of a Honeycrisp apple provides a refreshing counterpoint to the deep, buttery richness of the caramel. This symphony of sweet and tart flavors creates an explosion on the palate, making each bite an adventure. Beyond taste, the texture is equally captivating – the satisfying crunch of the apple followed by the smooth, yielding stickiness of the caramel is pure bliss.
Caramel apples are also incredibly versatile. They’re the quintessential Halloween treat, perfect for Thanksgiving dessert tables, or simply a spontaneous indulgence on a cool Tuesday evening. They’re a fantastic way to celebrate with friends, an enjoyable activity for families, and a comforting companion for a solo movie night. Their ability to transcend occasions and appeal to all ages solidifies their status as more than just a dessert, but a cherished tradition that brings people together, sparking joy and conversation.
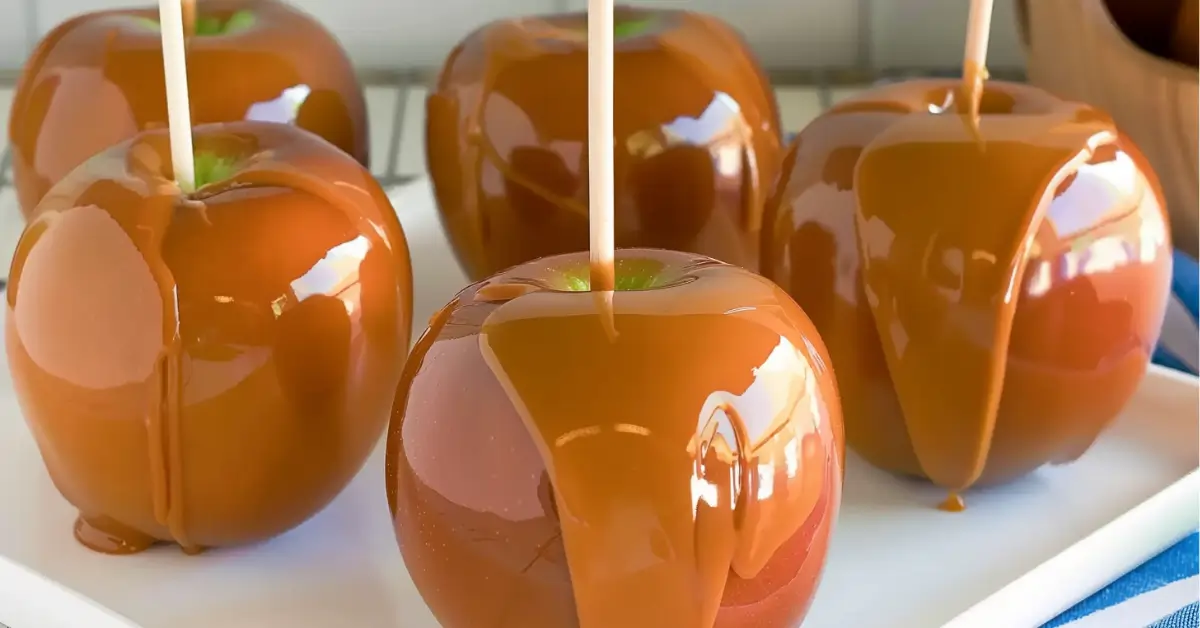
Mastering the Art of Homemade Caramel Apples: The Classic Recipe
While store-bought caramel apples have their place, there’s an unparalleled satisfaction in crafting your own. The process itself is a delightful experience, and the results are incredibly rewarding. Here’s how you can make your own ultimate caramel apples, a favorite fall treat, right in your kitchen.
Choosing and Preparing Your Apples
- Select the Right Apples: For the best results, opt for firm, crisp apples that can hold up to the caramel coating. Varieties like Granny Smith (for a tart contrast), Fuji, Gala, Honeycrisp, or Pink Lady are excellent choices. Avoid overly ripe or soft apples.
- Wash Thoroughly: Most commercially grown apples have a waxy coating. To ensure the caramel adheres properly, wash your apples rigorously under hot water, scrubbing gently with a vegetable brush to remove any wax or residue. Some people even briefly dip them in boiling water for 10-20 seconds to help with wax removal, then dry immediately.
- Dry Completely: This is crucial! Any moisture on the apple’s surface will prevent the caramel from sticking. Use a clean towel to dry each apple meticulously. You might even chill them in the refrigerator for 15-30 minutes after drying; a cold apple helps the caramel set faster.
- Insert Sticks: Firmly insert a sturdy wooden or bamboo stick (or even a reusable metal skewer) into the stem end of each apple, pushing it about halfway through the apple.
Preparing Your Caramel
While making caramel from scratch offers a gourmet touch, it can be tricky for beginners due to temperature sensitivity and crystallization. For an easier, equally delicious approach, using high-quality store-bought caramel is a fantastic option. Many brands offer individually wrapped caramels or block caramel specifically designed for melting.
- Melt Carefully: If using wrapped caramels, unwrap them all. Place the caramels in a microwave-safe bowl with a tablespoon or two of milk or heavy cream per pound of caramel. Microwave in 30-second intervals, stirring thoroughly after each, until smooth and fully melted. Alternatively, melt them in a double boiler or a heavy-bottomed saucepan over low heat, stirring constantly to prevent scorching. The ideal temperature for dipping is around 180-200°F (82-93°C).
Dipping and Setting
- Dip with Precision: Hold the apple by its stick and dip it into the warm caramel. Tilt the bowl slightly to ensure the entire apple is submerged. Swirl the apple gently to coat it evenly, allowing excess caramel to drip back into the bowl. Scrape the bottom of the apple gently against the rim of the bowl to remove any drips.
- Set Them Up: Place the dipped apples on a sheet of parchment paper or a silicone baking mat. If you plan to add toppings, do so immediately while the caramel is still warm and sticky.
- Chill to Set: Transfer the apples to the refrigerator for at least 15-30 minutes to allow the caramel to firm up completely.
For more detailed insights into perfecting your technique and adding a touch of gourmet flair, you might find inspiration in Ultimate Caramel Apples: A Sweet Taste of Fall Nostalgia.
Unleash Your Creativity: A World of Toppings for Your Caramel Apples
One of the most exciting aspects of making caramel apples is the opportunity to customize them with a myriad of delicious toppings. This is where your imagination can truly run wild, transforming a simple caramel apple into a personalized masterpiece. Providing a variety of toppings also makes the process an interactive and fun activity for all ages.
Popular Topping Categories:
- Nutty Classics: Crushed peanuts, pecans, walnuts, almonds, or even pistachios add a delightful crunch and earthy flavor. Toasting them lightly before crushing can enhance their aroma.
- Chocolate Delights: Drizzles of melted milk, dark, or white chocolate are always a hit. You can also press mini chocolate chips, chopped chocolate bars, or even cocoa nibs onto the caramel.
- Sweet and Crunchy Additions:
- Crushed Cookies: Oreos, graham crackers, Biscoff, or shortbread crumbs.
- Candy Bits: Toffee bits, mini M&Ms, crushed candy bars (Snickers, Butterfinger), sprinkles (rainbow, chocolate, seasonal), or mini marshmallows.
- Coconut: Toasted or plain shredded coconut adds a tropical twist and texture.
- Gourmet Touches:
- Sea Salt Flakes: A sprinkle of flaky sea salt creates a sophisticated sweet-and-salty profile that perfectly complements the caramel.
- Cinnamon Sugar: A blend of cinnamon and sugar can elevate the classic apple pie flavors.
- Chopped Dried Fruits: Cranberries, apricots, or even candied ginger for a burst of flavor and chewiness.
Tips for Topping Application:
To ensure your toppings adhere beautifully, apply them immediately after dipping the apple in caramel, while it's still warm and sticky. You can roll the apple in a shallow dish filled with your chosen topping, or sprinkle them on by hand for a more controlled design. For multiple toppings, consider dipping in chocolate first (after the caramel has set slightly), then adding other elements. Creating a topping bar is also an excellent idea for parties, allowing everyone to design their own perfect apple. This festive approach makes them an ideal choice for Caramel Apples: Your Go-To Classic Treat for Fall Gatherings.
Tips for Perfection and Sharing the Sweetness
Creating truly show-stopping caramel apples goes beyond just the recipe; it involves a few insider tricks and thoughtful considerations. Here are some additional tips to ensure your homemade creations are perfect every time and how to best enjoy them.
Ensuring Caramel Adhesion:
The number one complaint when making caramel apples is often the caramel sliding off. This is almost always due to moisture or wax on the apple. Double-check your apple preparation: wash thoroughly with hot water and soap (rinse well!), scrub off wax, and dry completely before chilling. A slightly textured apple surface (from rubbing with a paper towel) can also help. Additionally, make sure your caramel isn't too hot (which makes it too thin and prone to sliding) or too cold (which makes it too thick and hard to coat evenly).
Storage and Freshness:
Once dipped and set, caramel apples are best enjoyed within a few days. Store them individually wrapped in plastic wrap or parchment paper in the refrigerator. This helps keep the caramel from getting too sticky and the apple fresh and crisp. If they sit out too long at room temperature, the apple can release moisture, making the caramel gooey or runny.
Presentation Matters:
If you're making these for a gathering or as gifts, presentation can elevate the experience. Consider wrapping each apple in clear cellophane bags tied with a festive ribbon. For a party, arrange them artfully on a tiered platter or display them upright in a basket filled with tissue paper or hay. You can even personalize the sticks with small flags or tags for special occasions.
A Fun Family Activity:
Dipping and decorating caramel apples is a fantastic activity that brings friends and family together. Set up a "caramel apple bar" with bowls of melted caramel (kept warm in a small slow cooker on a low setting) and various toppings. Kids and adults alike will love customizing their own treats, creating sweet memories in the process. It's a wonderful way to bond and embrace the spirit of fall.
Creative Serving Suggestions:
While delicious eaten whole, for easier consumption at parties, consider slicing the caramel apples into wedges just before serving. This allows guests to pick up smaller, more manageable pieces and enjoy the flavors without the sticky mess. You can also serve them with a side of whipped cream or a scoop of vanilla ice cream for an extra decadent dessert.
Conclusion
From their tantalizing aroma to their perfect blend of sweet and tart, caramel apples truly encapsulate the essence of autumn. They are more than just a seasonal treat; they are a delightful tradition, a source of cherished memories, and a fantastic way to celebrate the vibrant spirit of fall. Whether you’re meticulously crafting them for a special occasion or simply indulging a sweet craving, homemade caramel apples offer an unparalleled satisfaction.
Armed with these easy recipes, creative topping ideas, and expert tips, you are now ready to make the ultimate caramel apples, a favorite fall treat that will impress and delight everyone who takes a bite. So, gather your ingredients, unleash your inner chef, and prepare to savor the magic of this timeless classic. Happy dipping, decorating, and most importantly, happy eating!
